By J. Daniel Sawyer
Step 4) The Glow
What lightning would be complete without an aura? Here's how we
make one. Add a new track, and Add Clip > Complex Filtering > Aureole.
Double click on the clip to set the parameters.
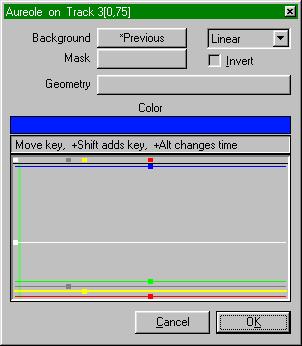
Here's roughly how it should be set up. Change colors the same
way you did on the lightning parameters. White controls aura opacity,
grey controls internal opacity, yellow controls aura width. Play
with the settings to get what you want. Here's what this one looks
like in the preview window:
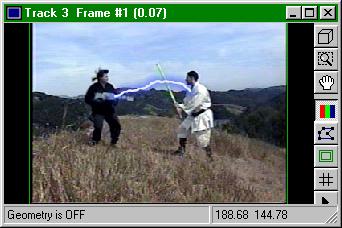
That's it. You've just made lightning.
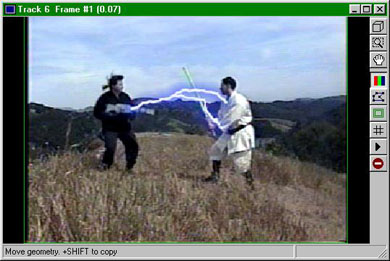
Step 5) Making the lightning move
The frequency setting on the lightning will make it vibrate, but for
a nice realistic look you'll want the whole arc to move as well.
To make it move and look realistic, animate the geometry it's based on
frame by frame, one vertex at a time. To see how it's looking, you
can step through the frames rapidly using the -> Arrow key, but I'd really
recommend doing test renders for this, just because things look different
full speed than they do frame by frame.
Step 6) Adding a fork
We basically do this step because spoons and lightning just don't mix
:-). We'll basically repeat steps 2-5, but there are two crucial
differences. One) The geometry needs to go between the ACTUAL lightning
rather than the geometry for the lightning. Observe:
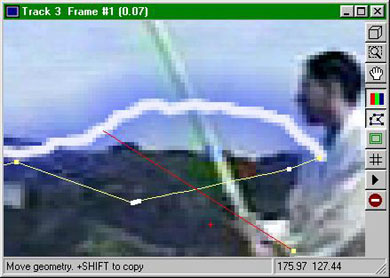
The new geometry is highlighted red so it will be easier for you to
see. This geometry MUST be animated frame by frame so that it's end
it kept in contact with the preexisting bolt, thus creating the illusion
of forked lightning.
Two) A paster clip is needed to keep the two auras from reinforcing
eachother. It should look something like this:
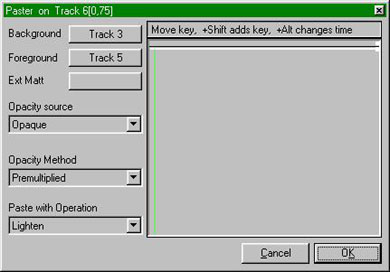
The Background is the first Aureole clip, the foreground is the second
Aureole clip. These settings give you results that look like this:
There you go. For more bolts or more forks, just duplicate these
steps multiple times. If you want to see the finished result, click
Here.
Please email any questions or comments to me at lokmer@bigfoot.com
-Lokmer
Previous Page

![[TFN FanFilms Now On YouTube.com]](/fanfilms/images/fanfilm-youtube.jpg)