By J. Daniel Sawyer
As of version 1.0, MainVision (formerly Axogon Composer) has a new feature,
a lightning generator, that makes it very useful for creating electrical
discharges and force lightning (MainVision can be downloaded for a free
trial from http://www.mainconcept.com/products/mainvisionWin.shtml
). Using it is relatively simple, but, as with everything in MainVision,
the results are fully customizable.
What we want to do is simple: Make a bolt of lightning between the two
characters.
What You Will Find Here:
This tutorial assumes you will only have one bolt of lightning.
If you want more, just duplicate steps 2-4 as many times as you like.
Also, the MainVision lightning generator does not generate forked lightning,
only single bolts. However,forks are exceedingly easy to "fake,"
and I'll show you how to do this as well. This tutorial assumes a
near-novice level of experience with MainVision, but also assumes that
you will be able to intuit the interface to a certain degree (i.e. for
example, that if I tell you how to add a video clip, you will know how
to browse your hard drive for the proper file).
Step 1) The Video
First, double click on Track 1 (the actual track, not the track title),
and in the popup Dialogue, choes Sources > Video Source and hit OK.
You should now see a video source clip on track 1. Double click on
the clip to set the clip parameters (like what video you actually want
to use).
Step Two) The Geometry(s)
Open up the work window for track 1 (double click on the track title).
Right click on the window and select Create>Contour. Create yourself
a line with four or five points on it (do NOT close the shape, leave it
as just a line), stretching between where you want it to begin and where
it should end (you can also animate it to jump from one point to anoter
by starting with all five points and then moving the vertices frame by
frame, one vertex at a time, to where you want them to go. See the
Lightsaber tutorial for a more thorough explaination of this technique).
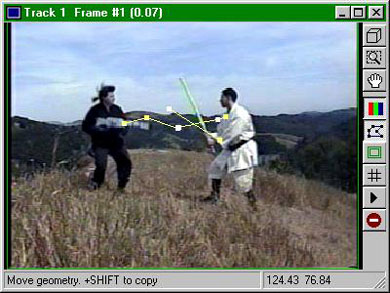
The picture below are the two geometries on my project, the primary and
the fork (we'll get into forking later).

Step 3) The Lightning
Now, click below the track title box for track one to add a new track.
On this track Add Clip > Geometry Shading > Lightning.
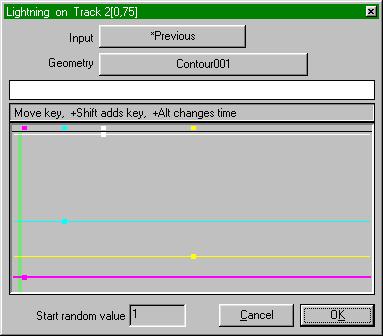
Double click on the clip and set the inputs.

The Pink key controls frequency (the rate at which the lightning oscilates),
the yellow key controls the lightning's width, the cyan key controls the
amplitude (the actual curve and shape of the lightning), and the white
controls opacity. In each case, lower=less, higher=more. To
change the color of the actual lightning bolt, click on the white bar and
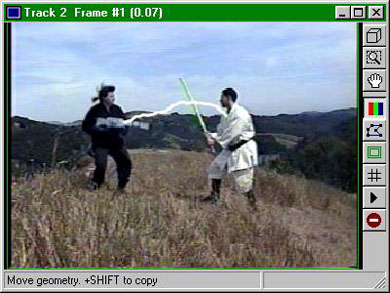
select a new color from the pallate. To see what your results will
look like, open up the work window for the current track and toggle the
geometries off, you will see the lightning exactly as it will appear in
that frame (see below).

Continue to next page.

