"Blast 'Em!!:" Creating Blaster FX
Part 6: Adding an Impact Flare
by Jedi Knight Toren Depor
1) Create a new light by right clicking (Command-clicking on the Mac) on the Objects folder in the Project Workspace and going to New and selecting Light. Rename the light "People Hit Flare." We are naming it this because this is the effect that is seen when a Blaster bolt hits a person.
2) On the Attributes tab of the Properties Panel, turn off Diffuse, Specular, and Shadows and turn on Lens Flare. Change the color to Red: 255 Green: 155 Blue: 102.

Figure 6-2
3) Go to the Flare Global tab on the Properties panel. Turn off "Fade When Behind Objects" and "Fade When Aiming Away." Change the X Scale field to 150.
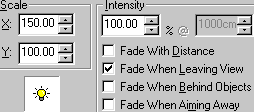
Figure 6-3
4) Go to the Flare Glow tab on the Properties Panel and select Glow 1. Set the color to White and both scale fields to 75. Set the Intensity to 85.
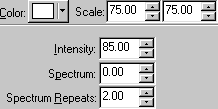
Figure 6-4
5) Select Glow 2 and set the color to Red: 255, Green: 155, Blue: 102. Set both scale fields to 150 and the Intensity to 125.
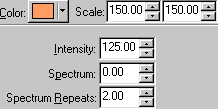
Figure 6-5
6) Go to the Flare Beams1 tab on the Properties Panel and select No Beams from the drop-down menu. Go to the Flare Reflection1 tab and do the same.
7) Open the "Orange Blast" Choreography from Part 3: Creating a Simple Firing Animation. Delete the "Metal Hit Flare" from Part 5: Adding an Impact Explosion. Drag and drop the "People Hit Flare" light into the choreography. Position the model so that the Flare is at the far end of "Path1."
8) Go to Frame 0 and select the "Shortcut to People Hit Flare" in the Project Workspace. On the Attributes tab of the Properties Panel, enter 0 into the Intensity field. Jump to Frame 16 and enter 100 into the Intensity field. Go to Frame 17 and enter 0. Expand the "Shortcut to People Hit Flare" in the Project Workspace and select the Intensity channel. On the General tab of the Properties Panel, change the Default Interpolation from spline to Hold.
Example:
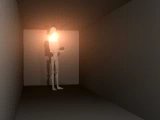
fire4.mov 28.7 KB
Part 1: Observations and References of Blaster Bolts
An analysis of the different types of laser fire, including stun blasts, and various related effects.
Part 2: Creating a Blaster Bolt
Creating a long and narrow cylinder with tapered ends and a glowing texture.
Part 3: Creating a Simple Firing Animation
Creating a path between the muzzle of the gun and the target.
Part 4: Adding a Muzzle Flash
Modeling and animating a simple muzzle flash effect.
Part 5: Adding an Impact Explosion
Creating the nice little explosion that occurs when a blaster bolt hits a metal object like a battle droid.
DOWNLOADS
Completed Project File 1.58 MB
Contains all of the materials, models, actions, and choreographies used in this tutorial.
Tutorial: Off-Line Version 217KB
All of these tutorials downloadable as a ZIP Archive.
Tutorial: Off-Line Version 222KB
All of these tutorials downloadable as a SIT Archive.
CREDITS:
Tutorial by Jedi Knight Toren Depor (a.k.a. Filmmaker Matt Pfingsten)
Special Thanks to
The Animaster Mailing List for providing such great feedback and support on all of my tutorials.
TheForce.Net for hosting this tutorial
Cactusbud Studios for their Battle Droid Model
Hash Inc. for making such powerful 3D software
George Lucas for creating Star Wars
