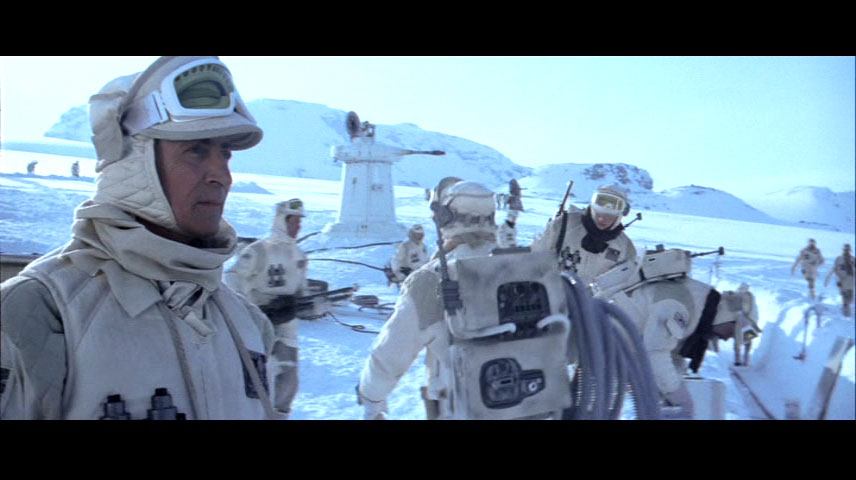

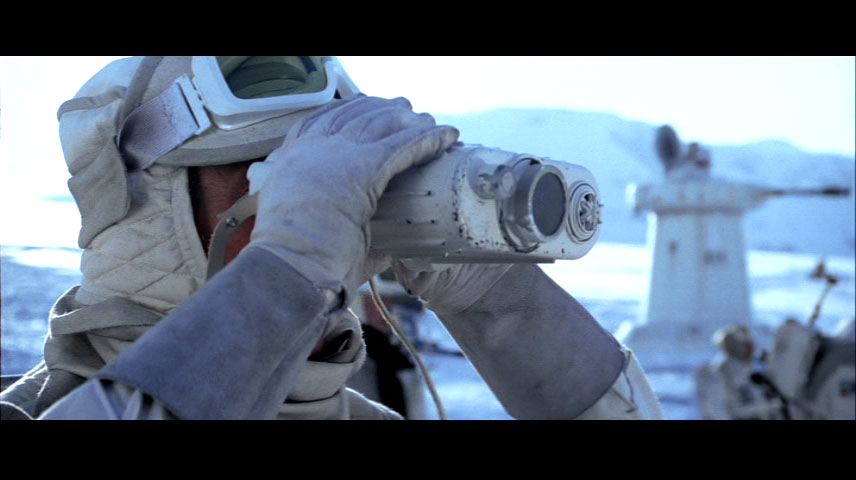
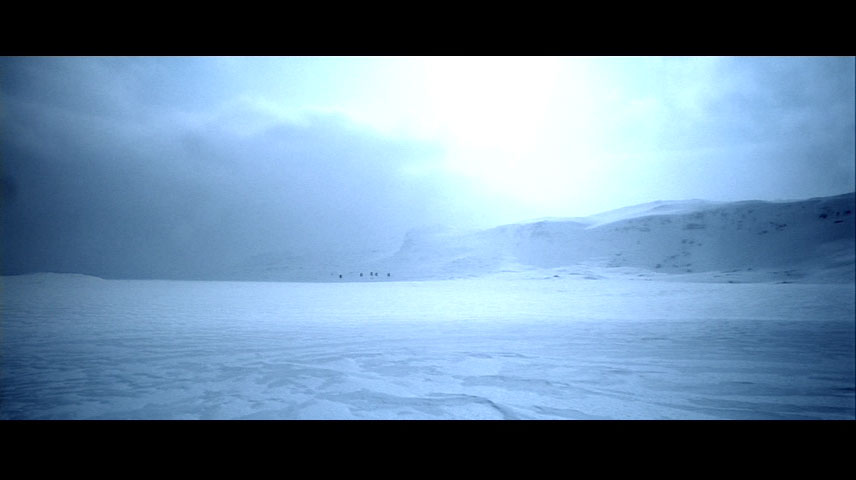
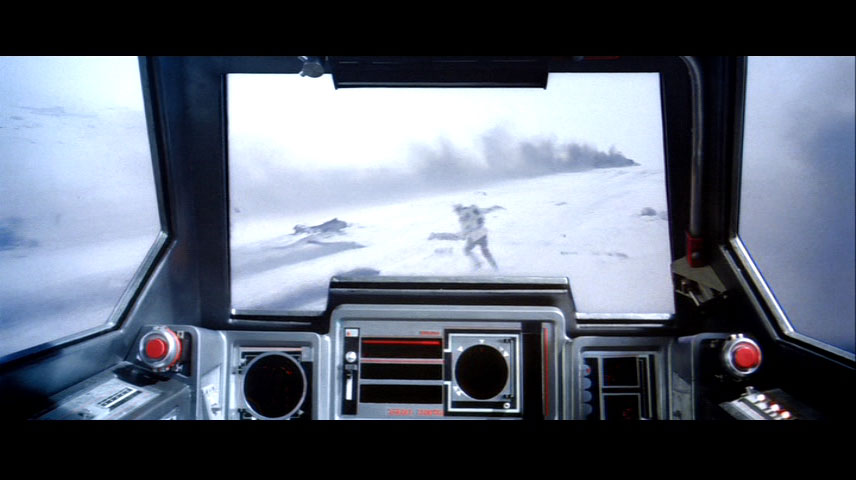
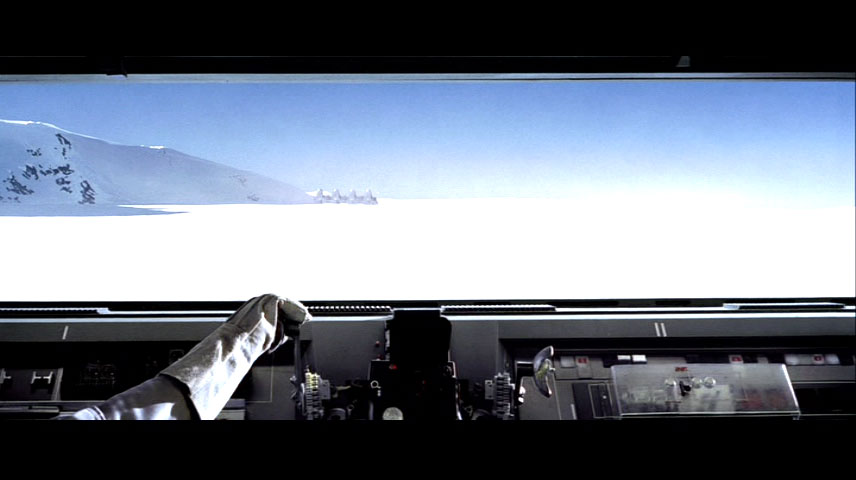
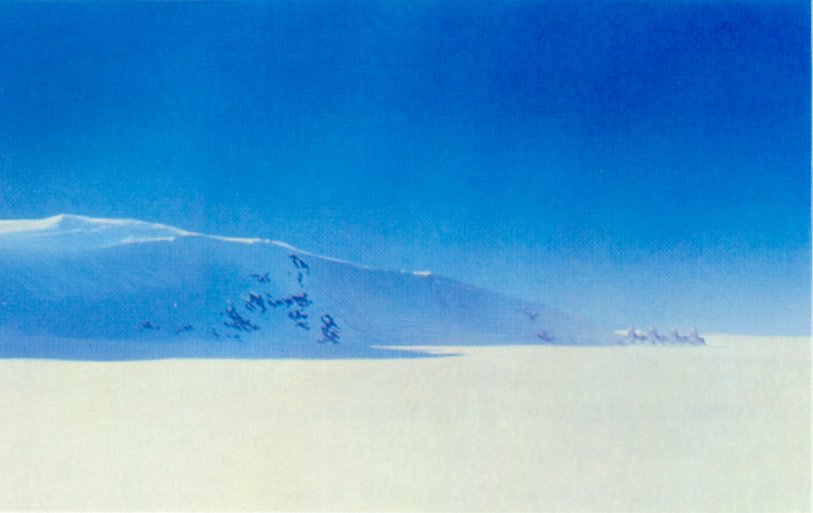
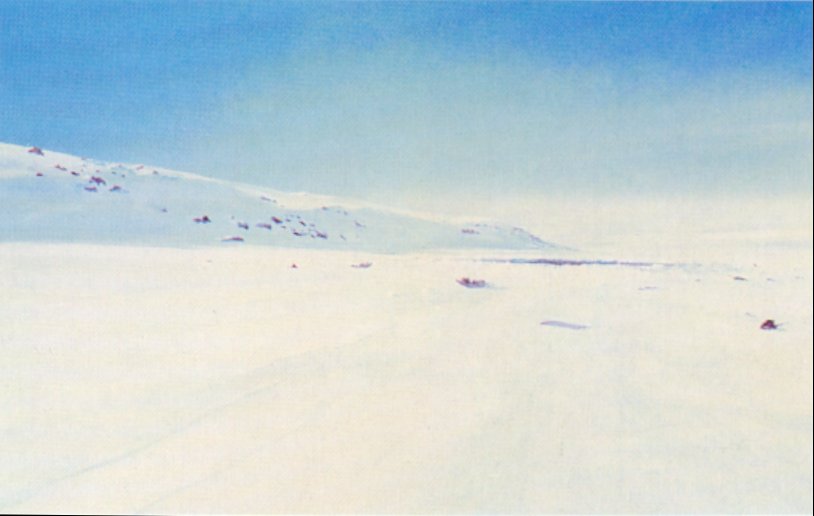
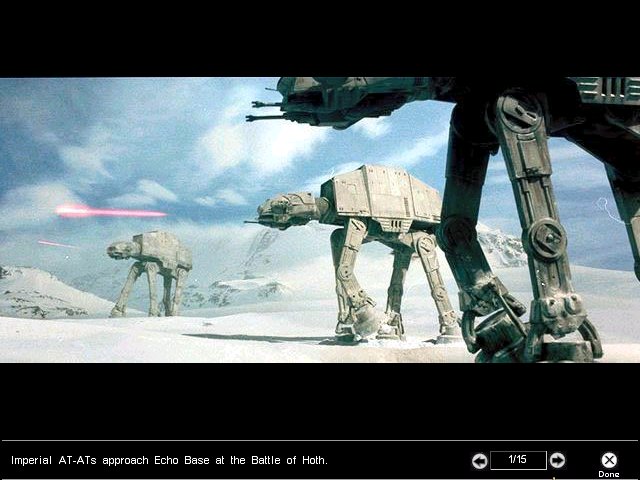
This is the North Ridge, as seen from the rebel trenches. The walkers are first spotted when they are on the North Ridge. The cloud or mist drifting off to the left is interesting; it may be rising steam associated with the landing site of the Imperial barges. If so then the distribution of the cloud indicates something about the wind direction. The sunlight appears brightest in the direction of the Ridge. What does this mean in terms of the planet's spin and time of day? NB: the North Ridge is north of something, but not necessarily north of this picture's vantage in the trenches. Perhaps it is north of the base, but east of the trenches and power generator?
The power generator is visible in the background. A trench runs to and from the camera position, but it may turn at greater distance. There is some hint that the trench turns right at a right angle at a point several hundred metres in the distance. On the largest scales of the map, the trenches may be zig-zags.
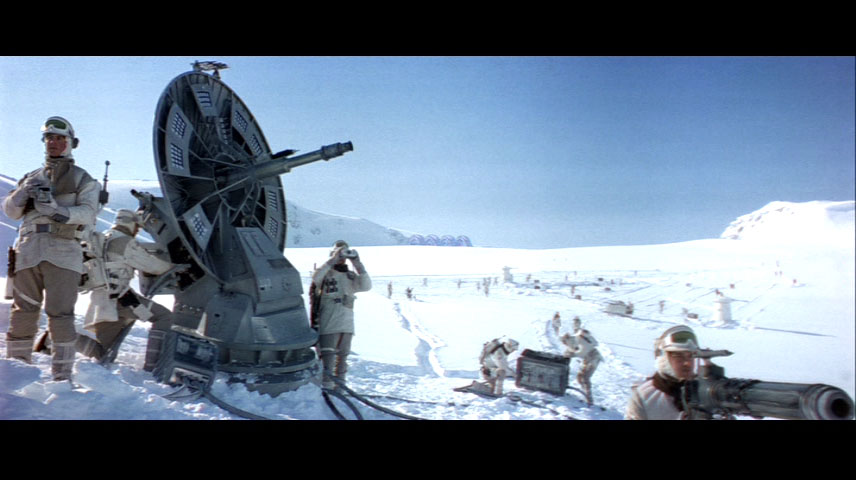
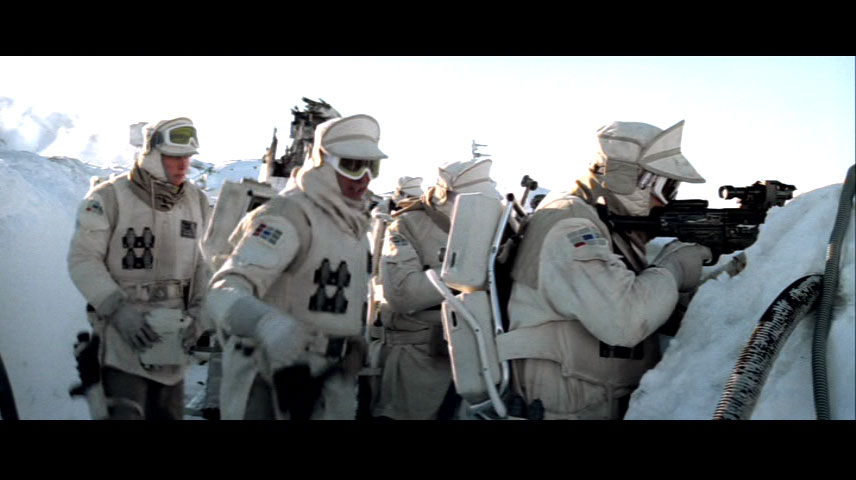
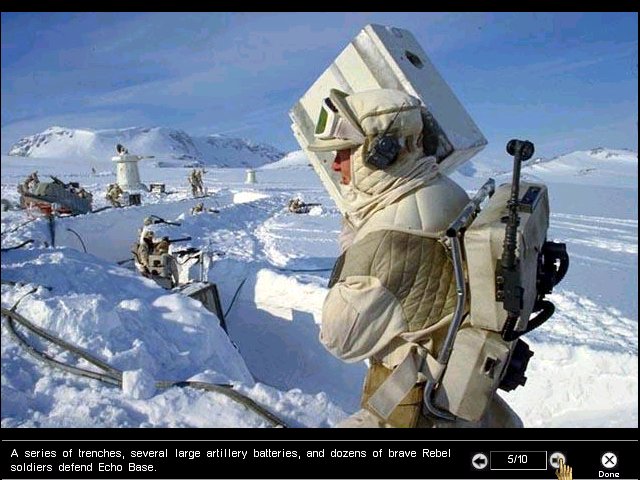
There are two turrets to the right of a trench. The guns point to the right, suggesting that this direction is defensively outwards. Is the turret separation greater than the turret-trench displacement? The turrets might draw power from cables running the length of the trenches.
Turrets and other large objects cast shadows to the right, meaning that the sun is generally to the left of this picture. Distant mountains near the generator are in shadow; but the nearer hills are sunlit. The mountains may be self-shadowed by steep surfaces.
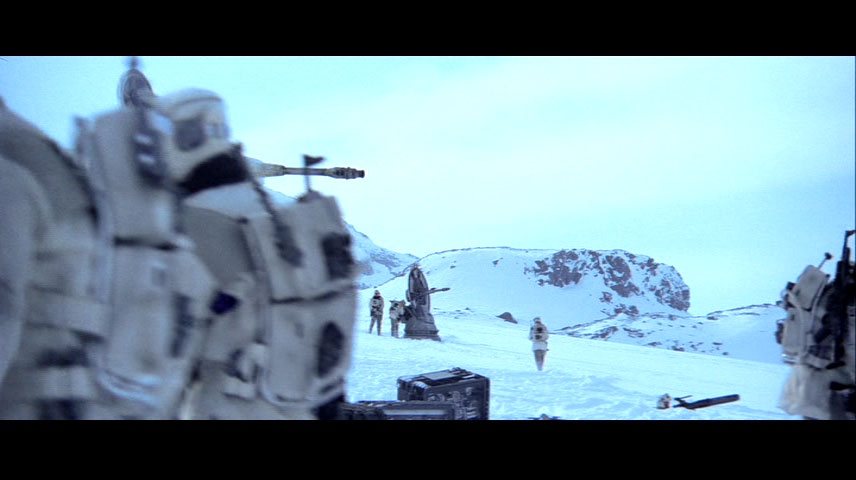
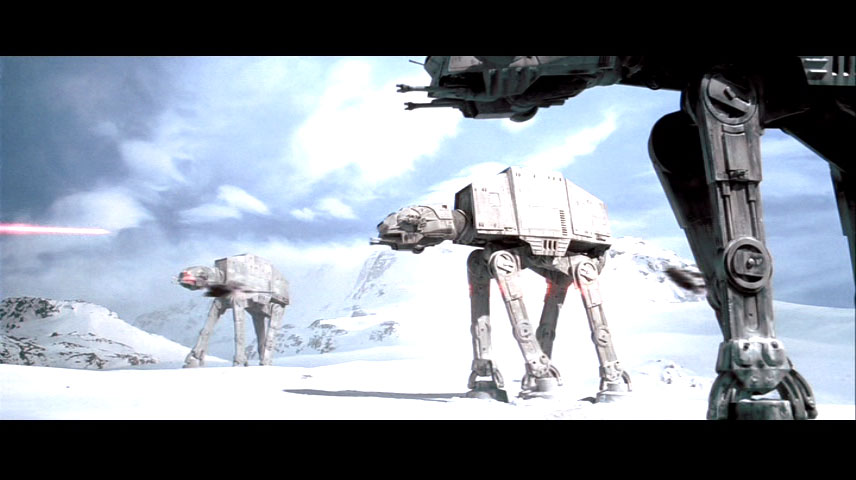
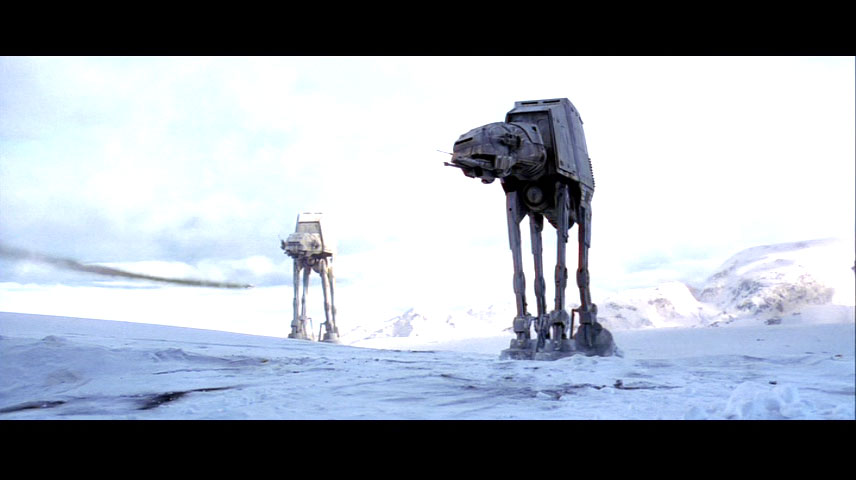
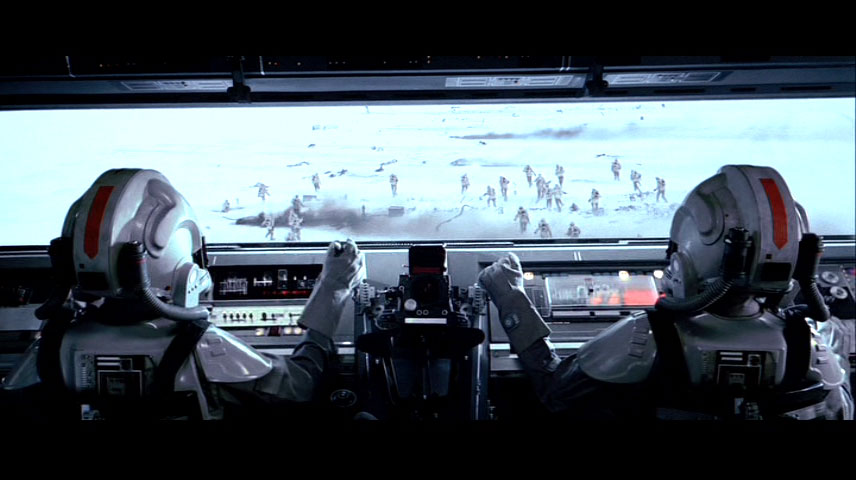
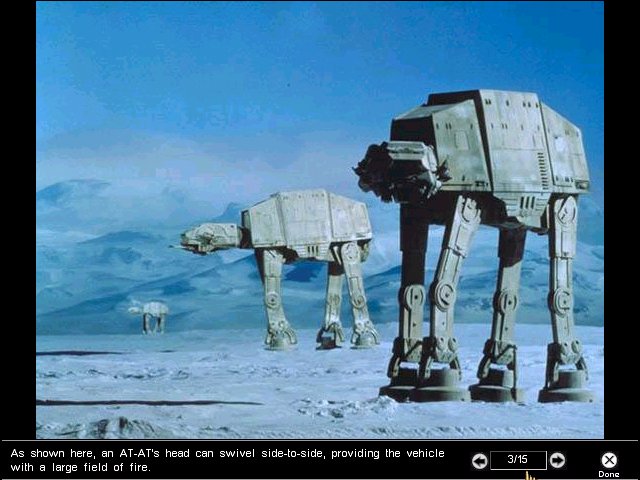
Five AT-AT walkers spotted emerging from the mist on the North Ridge. Their separations can be measured in relative terms. The lack of clarity means that the walker height projections can't be measured, and therefore the walker separations cannot yet be calculated in direct terms.
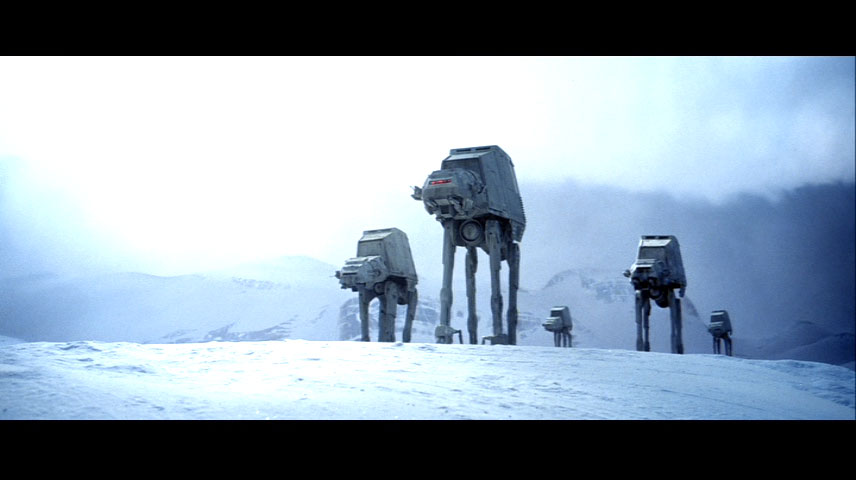
Closeup of the walkers on the North Ridge. Which feature is the North Ridge? Is it the foreground hill that earlier hid the walkers from the rebels' view, or is it the mountain range in the background?
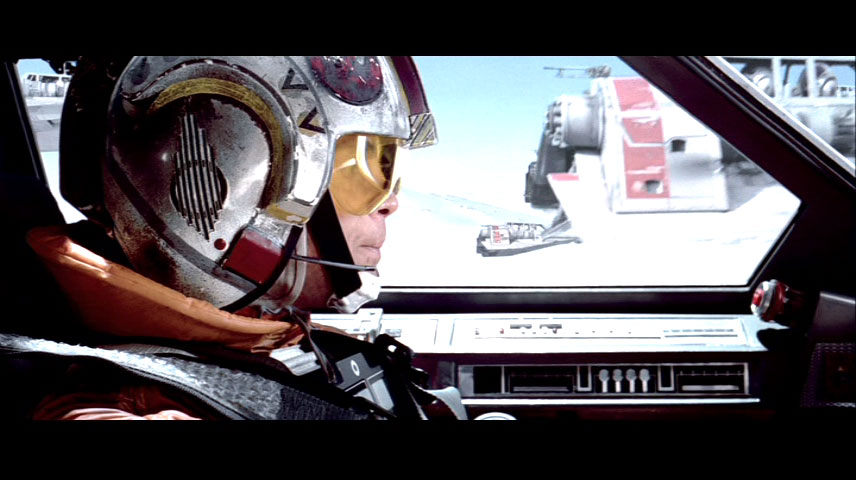
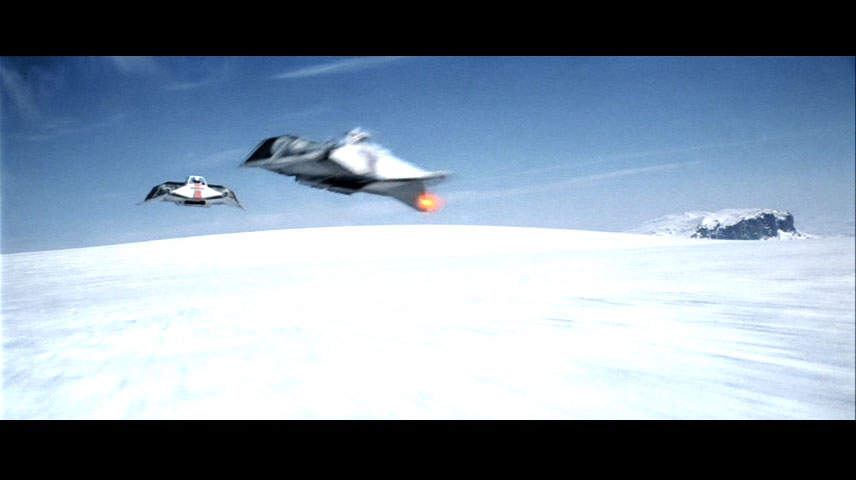
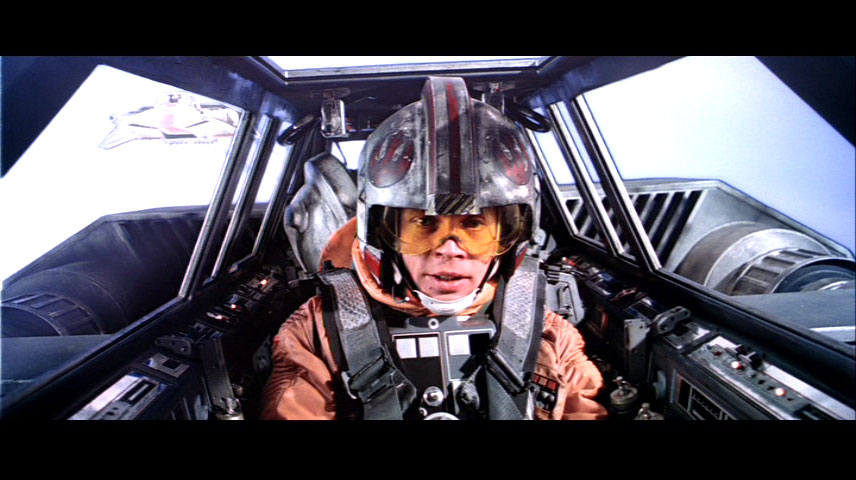
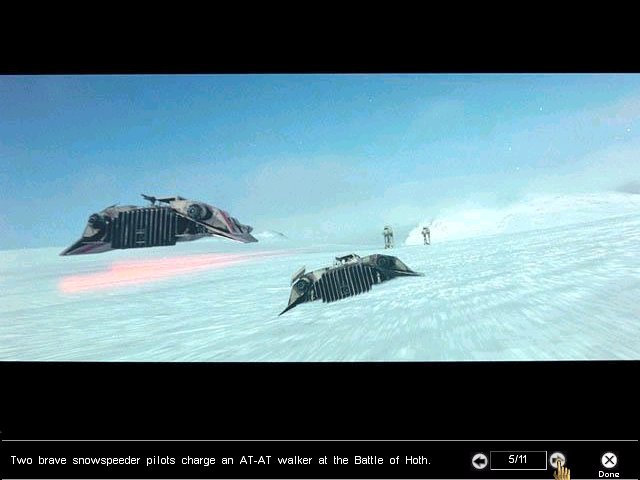
A pair of snowspeeders fly with the sun behind them. The solar direction is conventionally defined as east, if the battle occurs in the morning. Thus there is a wide flat glacier plain to the east of the main action of this stage of the battle.
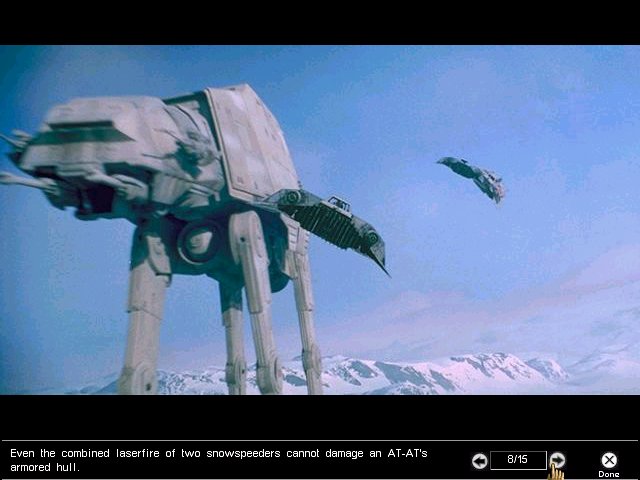
These walkers appear to have moved into shadow. There must be a hill or mountain off camera to the right or behind the viewer. Note the knobbly mountains behind the two walkers; the same background is seen later, behind two walkers after Wedge's kill.


Judging by their shadows, these walkers are moving SSW (or anything between SW and due S). Knobbly mountains are to the northwest.
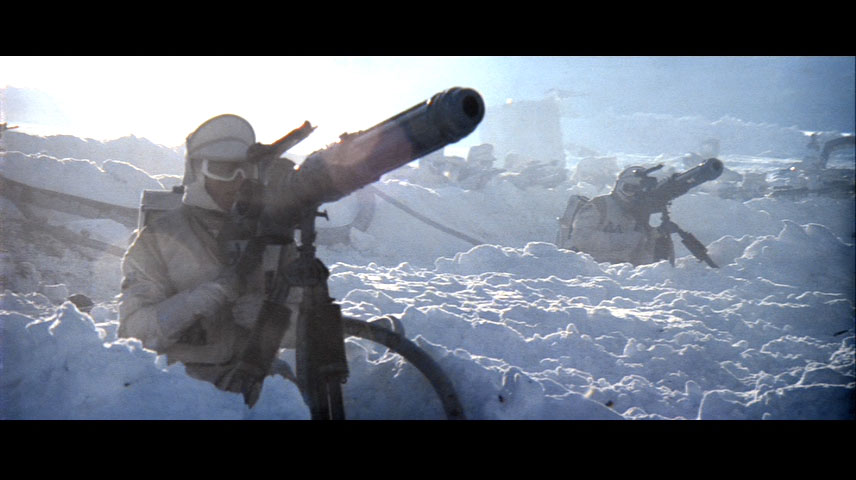
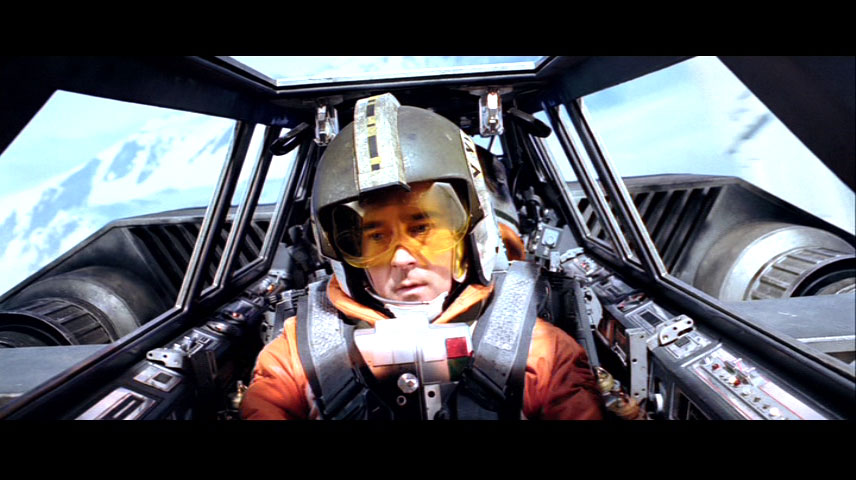
These tripod gunners are facing due west, according to the morning solar definitions.


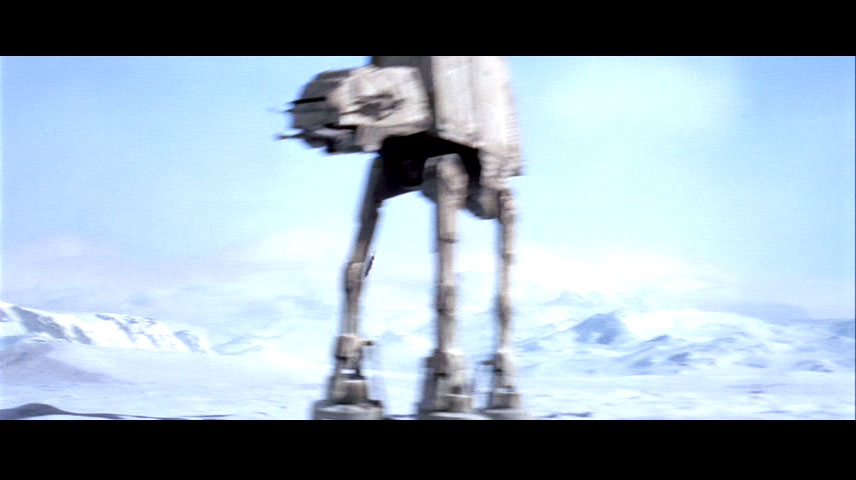
A lone walker, moving south or SSW with the knobbly mountains in the background.

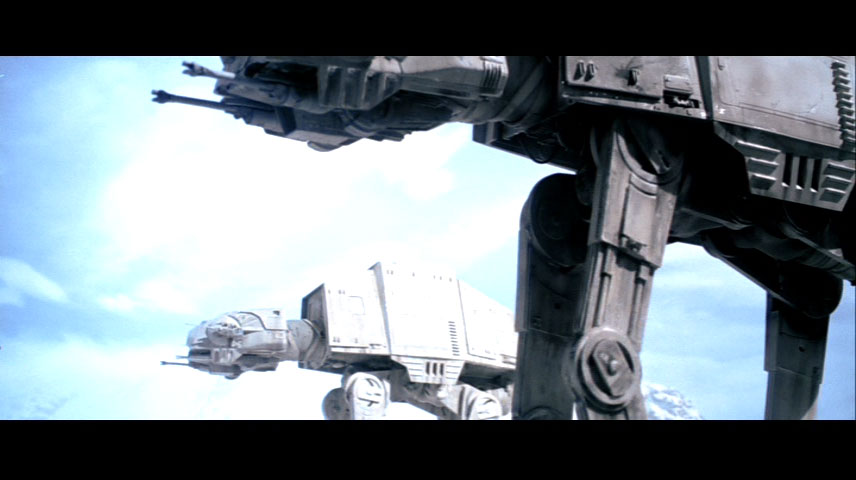
The more distant walker, to the right, is the one which will crush Luke's snowspeeder and will in turn be destroyed by Luke. The ratio of the walkers' projected heights indicates the inverse ratio of their distances from camera.


Luke attacked the hindmost of the two AT-ATs that were visible immediately before his crash. In the image above, we see that a third AT-AT walker had advanced less far than the previously visible pair. The lead walker is out of sight, probably off the left edge of this image.

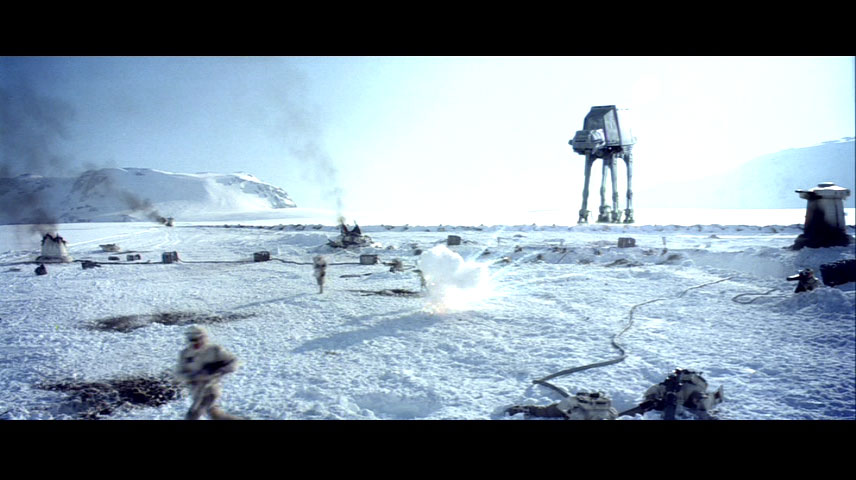
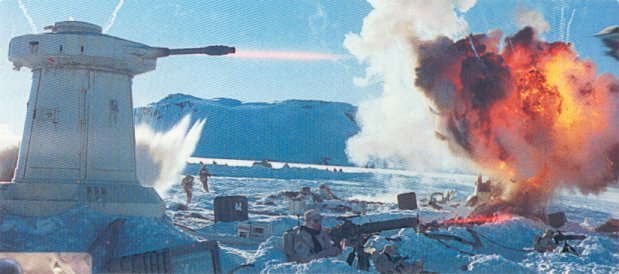
Here both the retreating rebels and General Veers' walker are facing towards their shadows. The sun is behind Veers. There are at least two parallel trenches which are parallel and straight for several hundred metres. Veer's walker is at the outer edge of the outer trench.
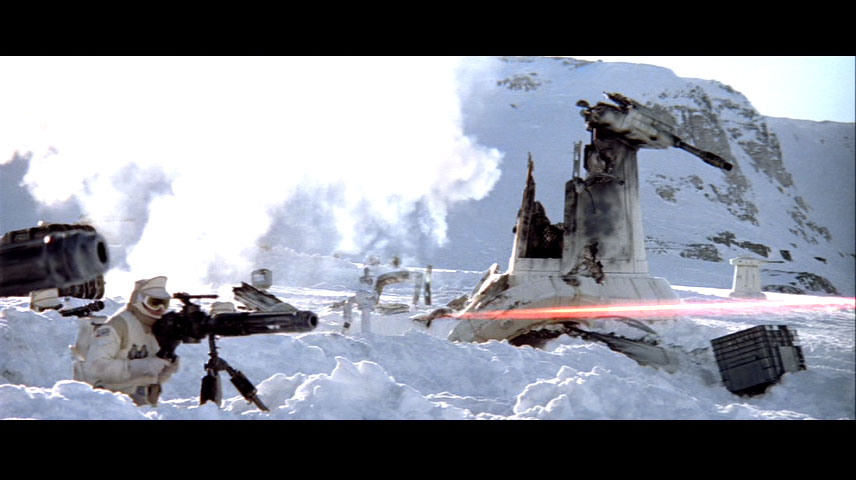
An exploded turret is on the innner edge of the inner trench, on the far right side of the picture. Another turret is futher away, to the left; it is set further back from the inner trench. Another turret in the forward position (close to inner trench) is visible in the distanct to the left. Turrets in this row appear to be separated by a fraction of a km.
Two ranges of mountains in the distance to the left and right.
The prevailing wind direction is from port to starboard (in the walker's frame of reference). Either the strength of the wind or the diffusive properties of the smoke particles have changed between shots. In the later frame, the wind appears to be faster as the smoke is drawn further along the ground as it rises.
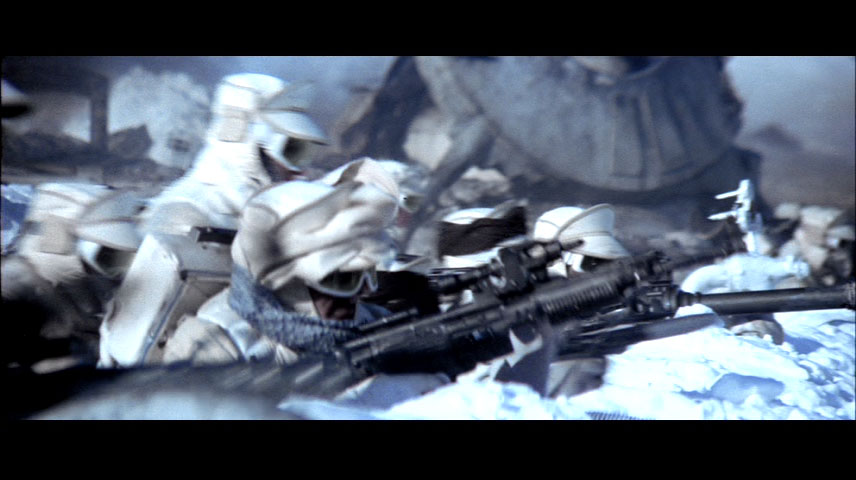
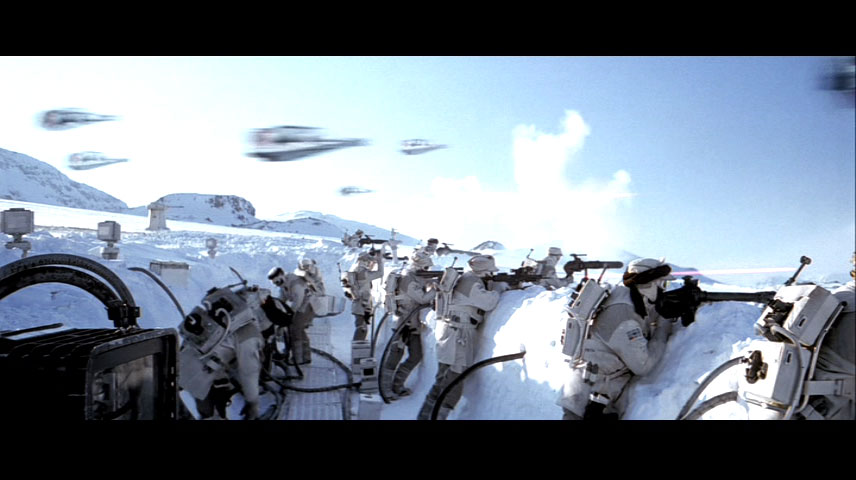
At least twenty surviving rebel footsoldiers are visible through the viewport.

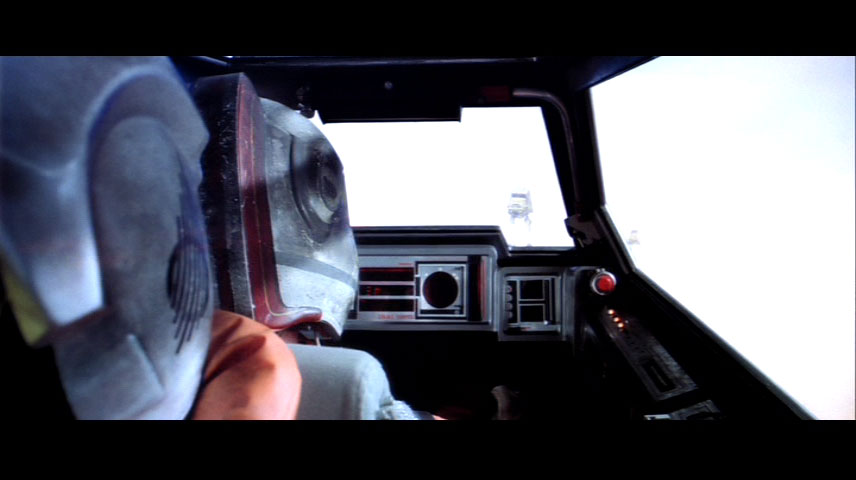
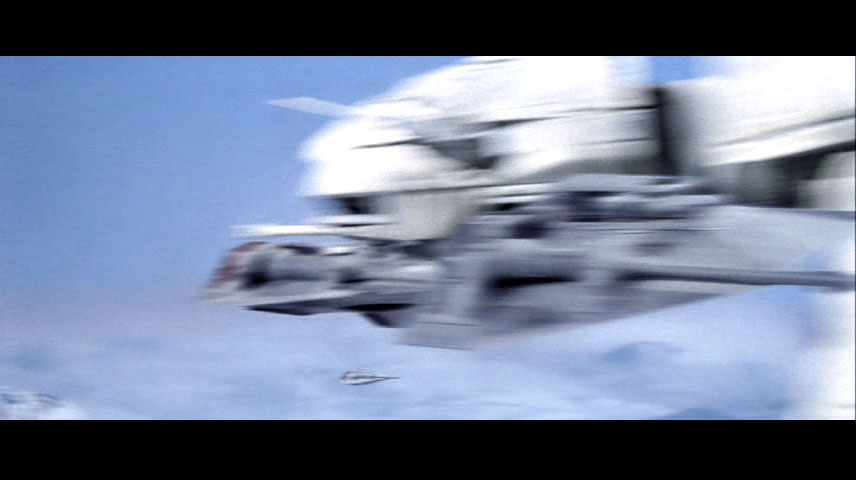
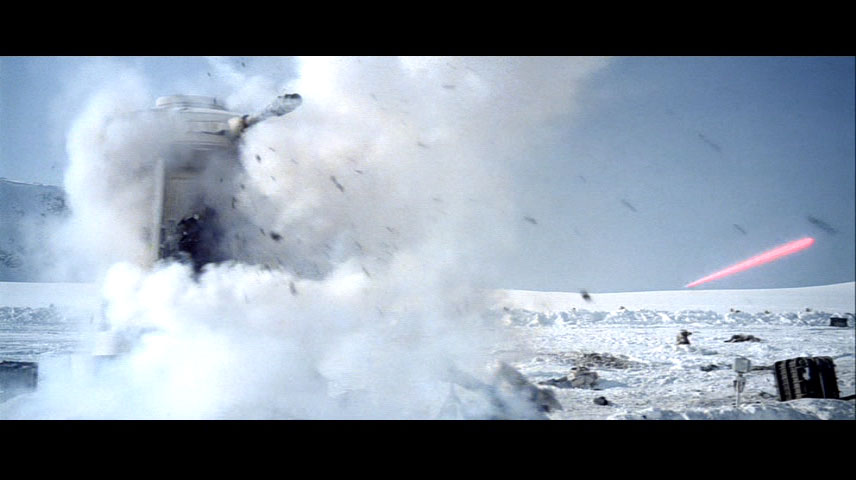
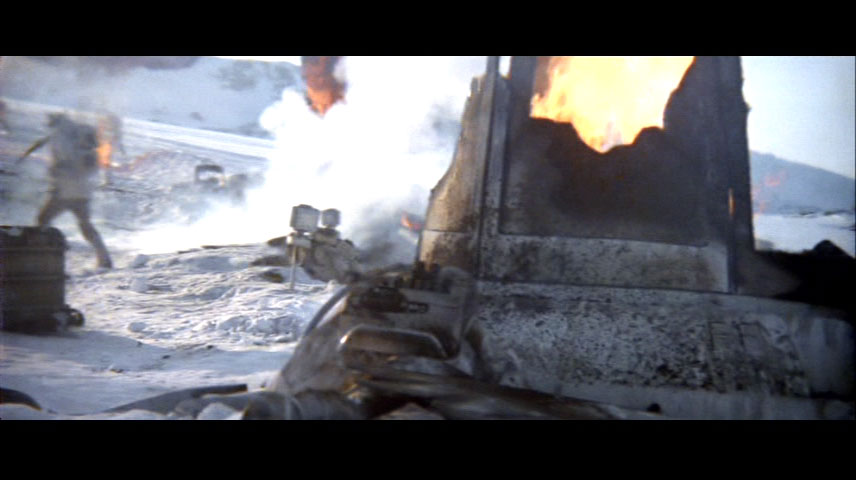
A snowspeeder attacked Veer's walker in a frontal assault. It was shot and spun off to the walker's portside. Smoke from the snowspeeder's impact side drifts off to the right, meaning that this photo is facing in approximately the same direction as the walker.
The mountain range in the background may be the one that includes the peak overshadowing the power generator. If so, the power generator is somewhere off the right side of the picture. (The present view would be towards the southeast.) There is a linear feature near the horizon on the left of the frame; it may be disturbed ground or part of a trench.
The probot landing scene is afflicted with a blooper. The event is shown twice, once from a universal, impersonal perspective and once as viewed by Luke Skywalker. Both shots are the same except that one of them is a mirrored image of the other. Which one is real? There are several restrictions. Luke Skywalker had a line of sight to the impact site. There is a steep mountain range nearby, and Luke was not on it. He rode across a flat plain with snowdrifts and little rock.
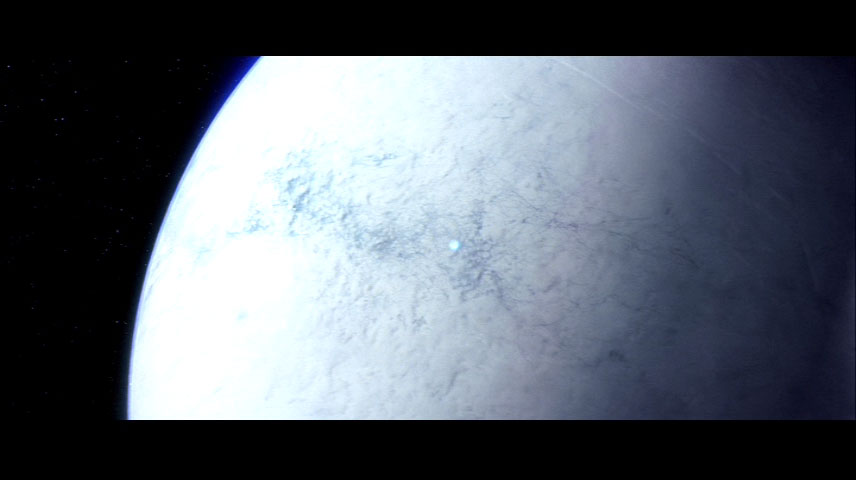
 Probot's atmospheric descent over the mountain range somewhere in the vicinity of Echo Base. How did the droid determine the best site for a landing? Does it make an intelligent estimate about the optimal sites for human settlement or military construction?
The impact explosion as seen from two points of view: impersonal; and Luke's.
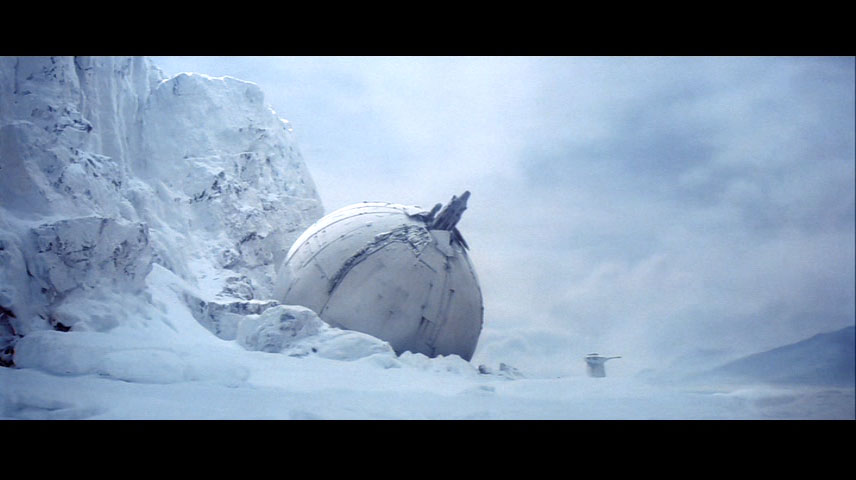
The probot emerges from the steaming crater caused my the hyperspace pod's impact.
The power generator is on the west side of a mountain range. Shadows of the mountains fall upon the generator in the morning light. By the time the generator was destroyed, the sun had risen above the range sufficiently for the generator to be sunlit. The axis of the generator is directed east-west. The structure may penetrate the mountain ground, possibly connecting to the rebel base under the mountains to the east.
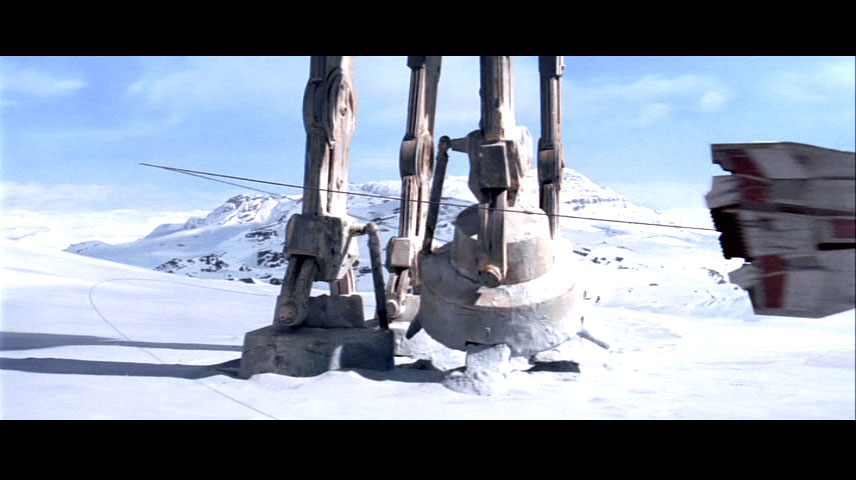
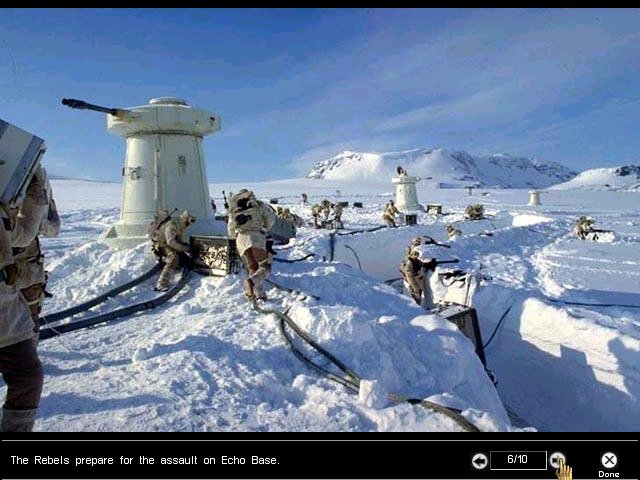
There are several anti-infantry turrets on the flat ice surrounding the power generator. They are more widely spaced than those situated amongst the trenches.
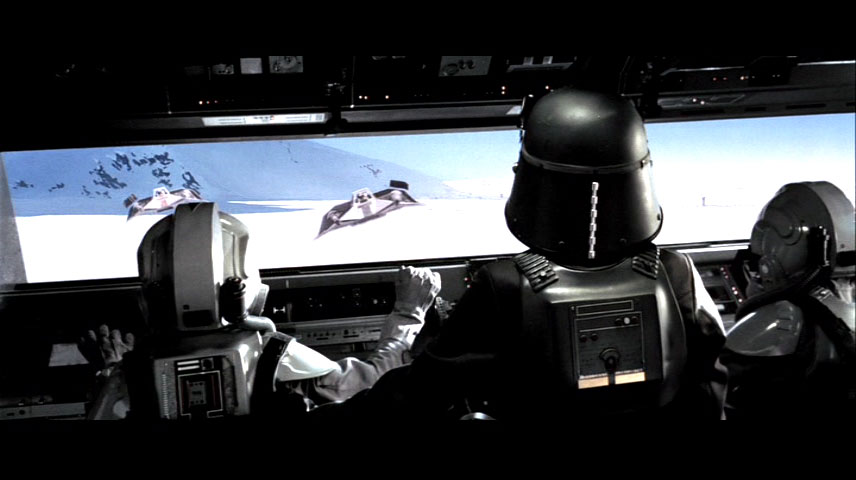
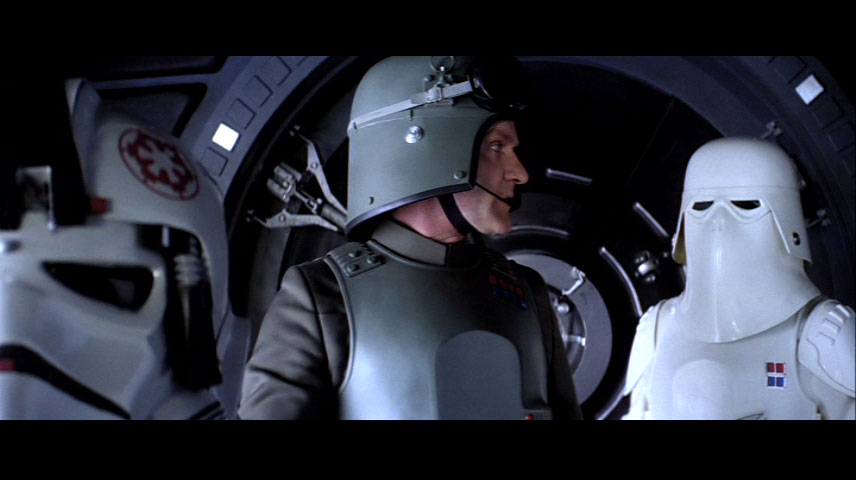
Views from General Veers' walker.
The probot found the rebels' main power generator. It was also within sight of at least one of the anti-infantry turrets. At the time of the probot's discovery (in "zone twelve" moving east) the generator was not shaded by the nearby mountain range. By comparison with the morning battle, the discovery must have happened in the middle of the day or afternoon. Judging by the hills in the background, the probot is likely to have passed the generator on the north (battlefield) side. By moving east, the probot would have been coming closer to the area of the battle trenches (possibly constructed later) and perhaps the base itself.
The rear trenches have a direct line of sight to the power generator. Other features visible include the base mountain range to the south, and the southern extremity of the western hills.
The rear trenches received long-range fire from the Imperial vehicles as soon as the enemy presence was reported. This means that the rear trenches have a line of sight to part of the North Ridge. However the power generator must still be obscured from the North Ridge; otherwise the AT-ATs would have shot the power generator immediately. Several possibilities:
When General Veers' walker reached this position, he was headed almost directly into his shadow, ie. due west by the solar definition.
Rear trenches, as seen from the start to the end of battle.
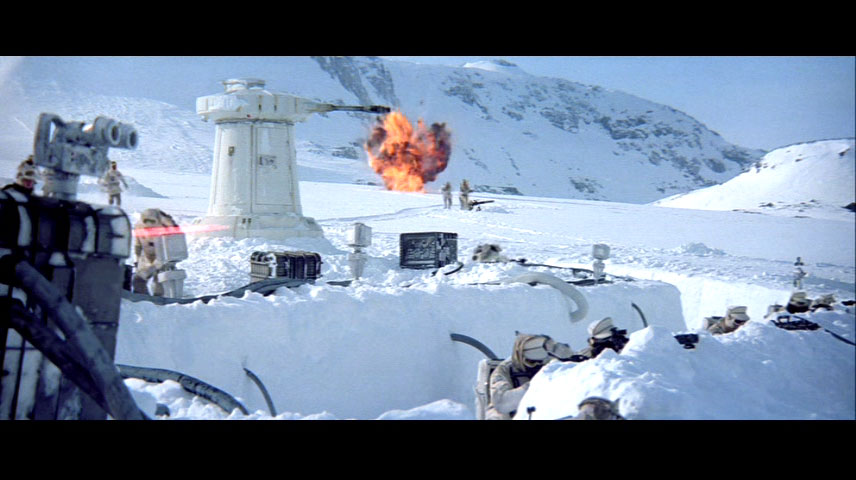
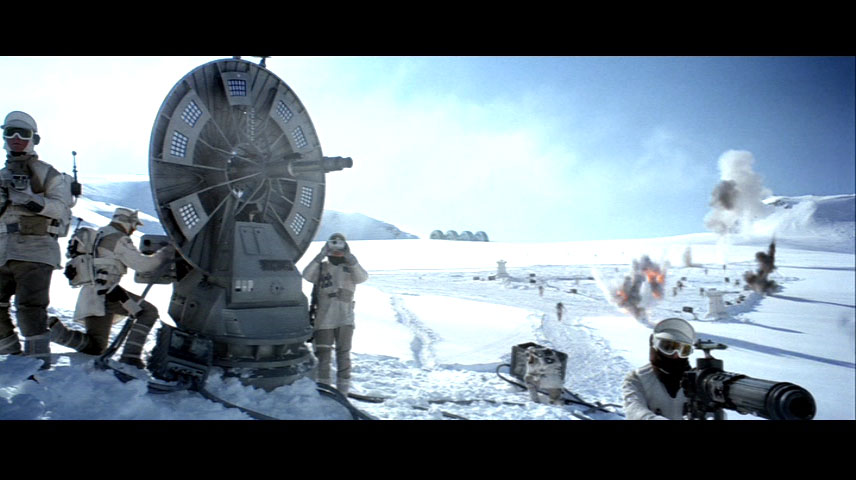
There is one particularly identifiable anti-infantry turret. It sits on the inner side of a right-angled corner in one of the trenches. The key turret was destroyed by enemy fire early in the battle, leaving only a flaming base. There is another turret to the left of the reference turret, at less than a hundred metres away. Another turret sits further uphill in the background, and there is a second trench further up the slope. There is an assortment of tripod guns and dish artillary in the surrounding area.
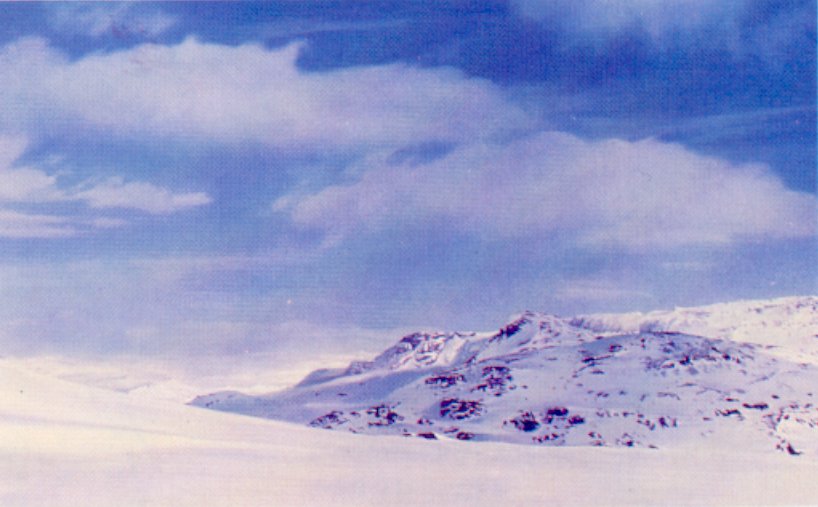
Background landfroms include is a steep range of mountains, and another detached hill ridge at a closer distance. The hills visually overlap the mountains. The power generator is not visible from this position, but the mountains resemble the base (south) mountains and hills may be the ones that are visible to the west of the rear trench. There ground slopes down outwards from the trench; any force attacking the trench from outside must move uphill.
The moutains to the south are shaded, indicating that they run in a NE-SW line. Juding by shadows, the turrets point west.


Earlier stage of the battle, before the destruction of the corner turret. The shadows and illumination of the moutains and hills are explicit in this photo.
The explosion of the landmark corner turret. The tripod gunners are seated in pits in front of the outer trench. The inner trench is clearly visible further uphill. The trench seems to terminate at the adjacent turret; perhaps this is only a forward branch of a longer trench system. The trench may have a T-junction uphill.
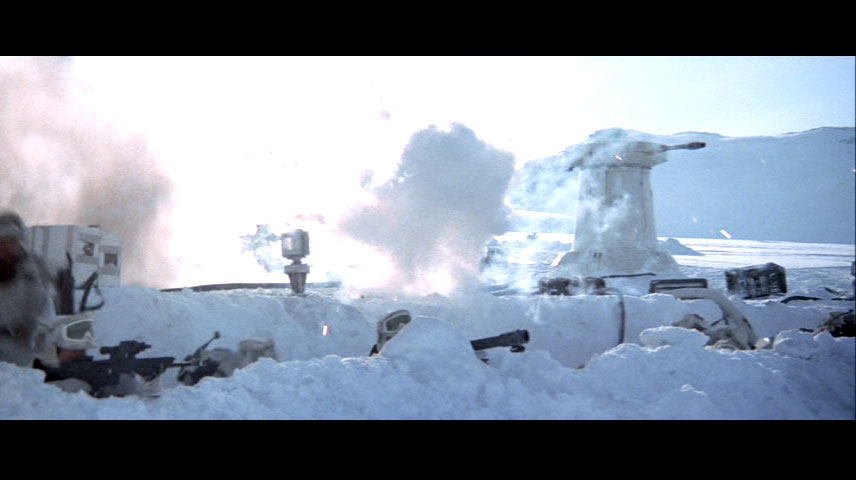
This appears to be a closeup of the corner turret after its explosion.
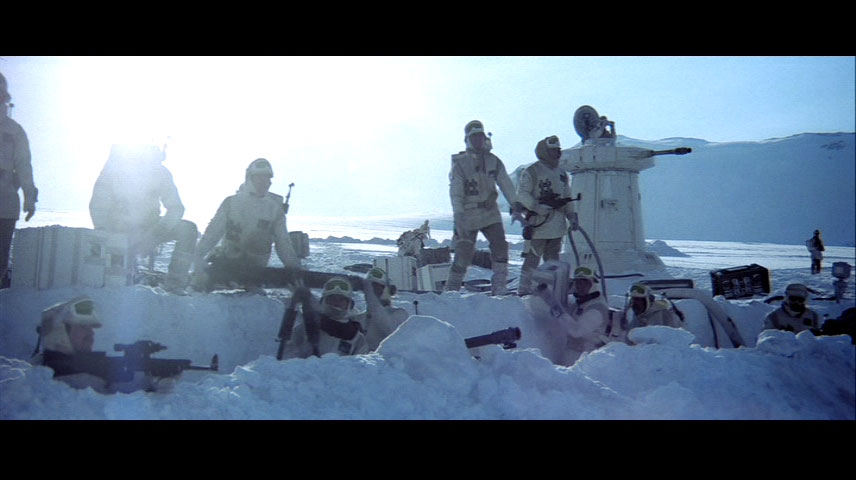
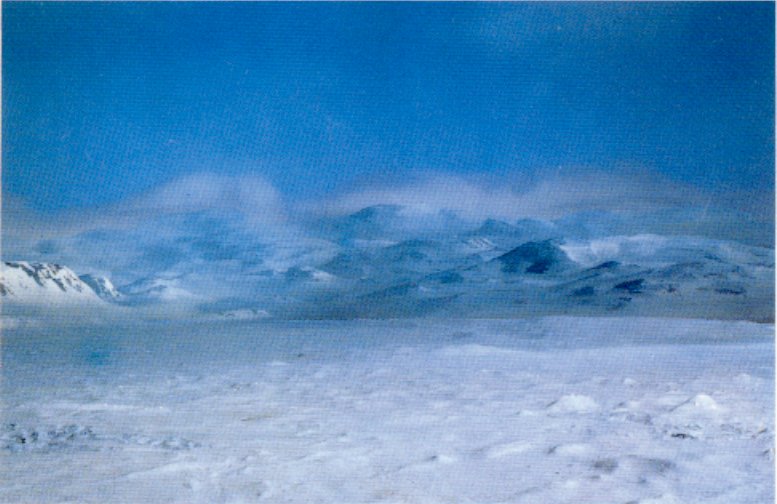
The North Ridge peaks seem more formidable than most of the mountains seen around the rebel base. During the battle, heavy cloud hung on the north/west(?) edge of the visible part of the ridge. Did this mist originate with ice evaporated in the heat of the Imperial landing?
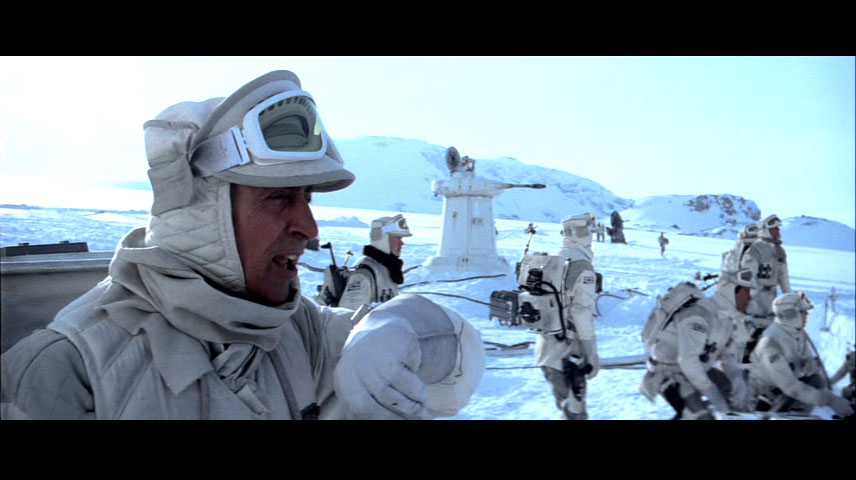
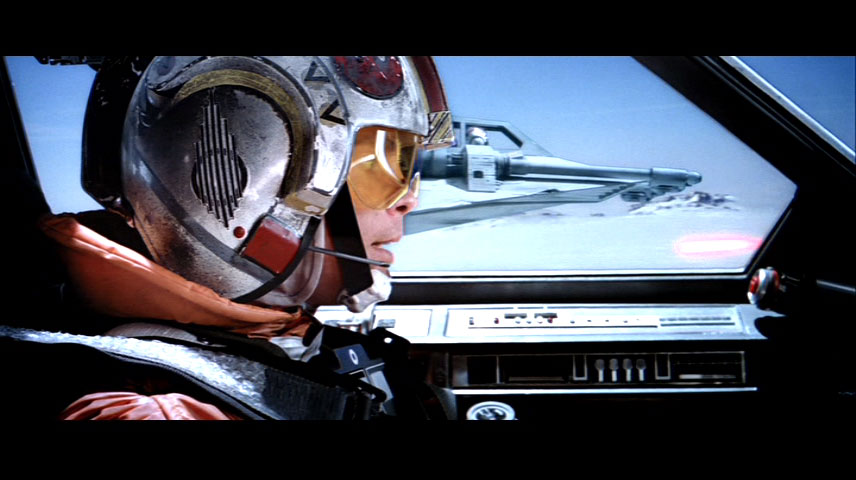
The walkers initially appeared to be headed towards the officer who spotted them from the forward trenches. The AT-ATs were headed just a few degrees to the left of their own shadows. Thus they were headed west/southwest.
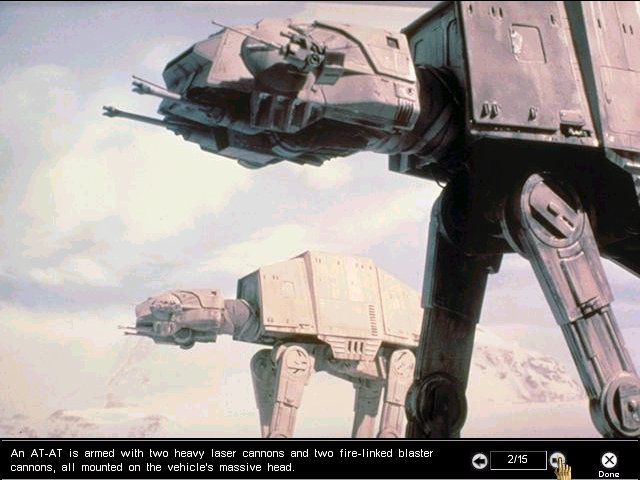
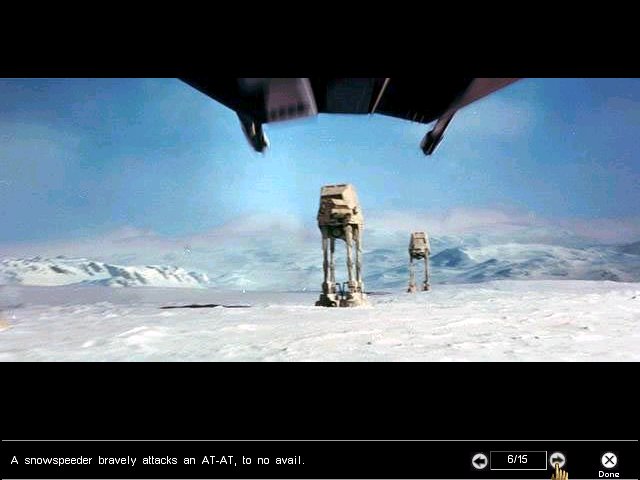
Close view of AT-AT walkers at the North Ridge.
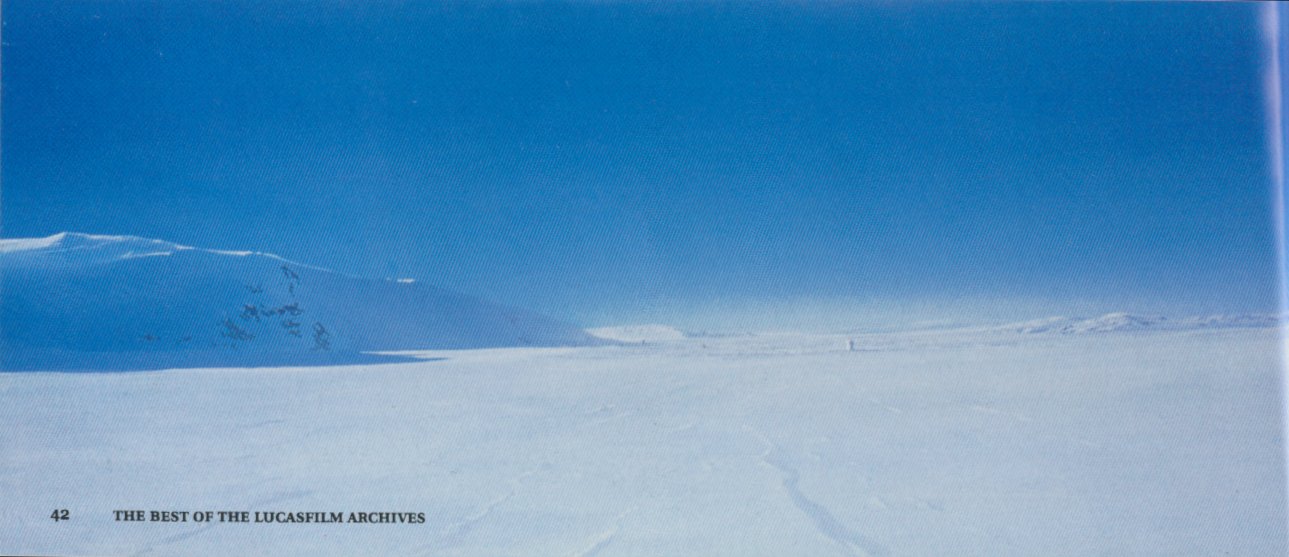
The distant North Ridge as seen from the rebel trenches.
Knobbly mountains in the background of the walker advance, before and after Wedge's kill. In the first shot two walkers are shaded by a landform off camera to the right or behind the viewer. In the later shots, the action is in sunlight again. The final shot shows only one walker; perhaps it is a straggler?
Flat shield-shaped mountain to the north of Wedge Antilles' AT-AT kill.
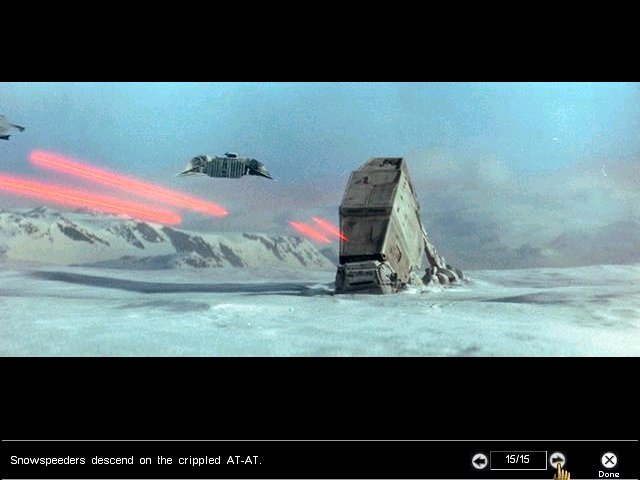
The tying of Wedge's walker.
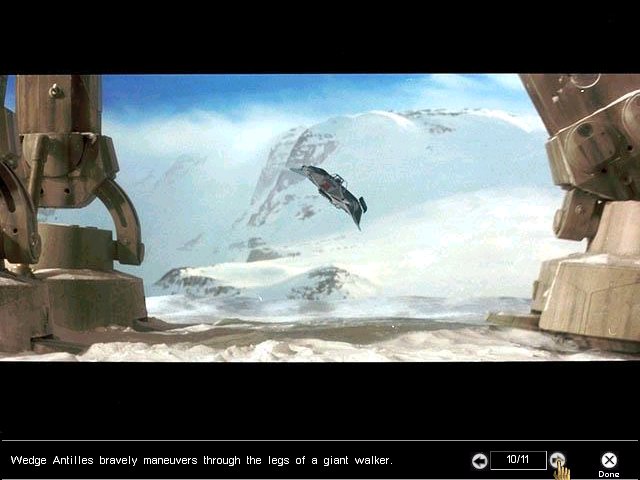
Above is the background image for a view of the site where Luke Skywalker destroyed an AT-AT walker. This occurred later in the battle than Wedge's kill, so it ought to be at a place south of the shield mountain [described above].
Luke Skywalker's AT-AT kill, possibly east of some of the knobbly mountains. According the the TESB Script Fascimile p.36, this walker is destroyed to the right of Veers' path to the power generator.
The ion cannon must be somewhere that was completely inaccessible to the Imperial walkers until after the destruction of the power generator. Otherwise it would have become a priority target, and would ahve been destroyed at an earlier stage of the battle.
The ion cannon site is somewhere very close to the day-night terminator at the time when the first transport took off. Judging by the way sunlight falls on this scene, the cannon points southwards and has an icy cliff to its immediate north. The ion cannon is defended by antipersonnel turrets at the base of the cliff.
I tentatively place the ion cannon on the south side of the mountain range that contains the main part of the rebel base. The entrance seen in the movies would be on a different face of the range. The South Entrance is somewhere near the ion cannon, and Wedge Antilles passed the remains of the ion cannon as he made his way to the parked X-wings.
When stormtroopers penetrated part of the base, Princess Leia ordered all surviving troops to the south slopes to defend the fighters. Walkers are faster than men on foot, so there must be a natural barrier preventing Veers' forces from following. Perhaps there are man-sized tunnels through the mountains, connecting the north and south faces? Those troops who survived the withdrawl would have left on the transport preceding Luke Skywalker's launch, and which was defended by Wedge Antilles.

Luke Skywalker makes his way to his starfighter on the south slopes, as the Millennium Falcon takes off from the hills behind him. Luke is walking across east-facing ground (according to the solar direction in the mid-morning definition). The Falcon must have kept near the ground after leaving the base, because its hangar was not the south one; the ship must have flow around to the south side.
The south slope launch point for the rebel starfighters and the last transport ship. The head of R2-D2 seems to be illuminated from his left, suggesting that Luke's X-wing is facing south.
There are several constraints on the location of the place where Luke Skywalker fell and was found by Han Solo.
Firstly, it cannot be far from the wampa lair. Skywalker was injured, delerious and freezing. Even if he moved in a straight and deliberate line, he could not have gone far on foot. He is probably no more than a hundred or so metres from the cave.
Secondly, Zev's snowspeeder travelled mainly to the north and west. It must have started somewhere near the main (non-south) entrance of Echo Base. In screen terms, Zev had something like a minute of flight; therefore (allowing for some random circling) Solo's camp is probably on the order of twenty kilometres (or less) away from the base in a northwest direction.
As he rode out into Hoth's dusk, Solo was headed towards the sunset, or perhaps slightly towards the right of it. That means a westerly, or WNW heading in relation to the rebel base.
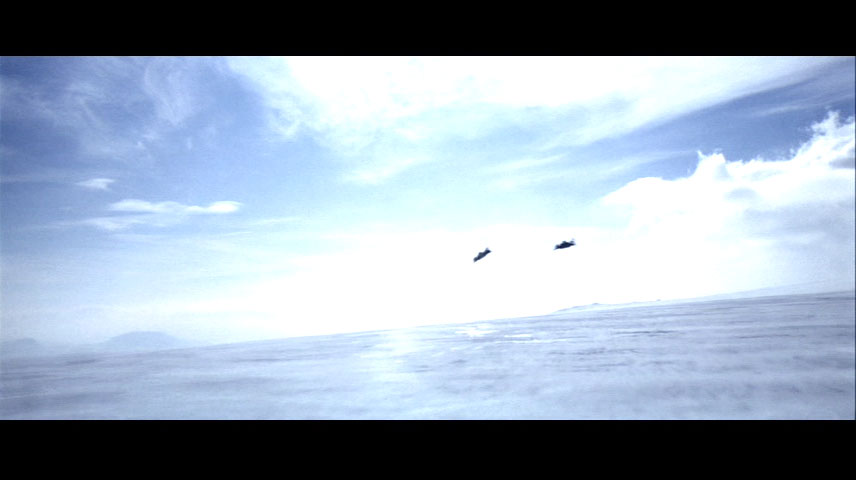
Four snowspeeders zoom across the Hoth landscape at dawn. Zev detects Han Solo's makeshift camp. With the dawn sun being in the east (by definition and by assumption) the snowspeeders are flying north initially. Zev's flight tends westerly sometimes (the landscape he faces is lit directly by the sun behind him).
Solo built a camp at the place where he found Skywalker. There is a large hill or mountain across the glacier to the east. Zev's snowspeeder approached from the east (sunward) direction also. Another interesting point: snow is heaped on the west side of the camp structure; if it was windblown then the prevailing wind direction of the night blizzard was westerly.
The orientation of the main base hangar door is difficult to guess because the natural lighting is too diffuse in most photos. However the dusk light falling on R2-D2's dome (assumed to be westerly) suggests that the door faces north or northwest.
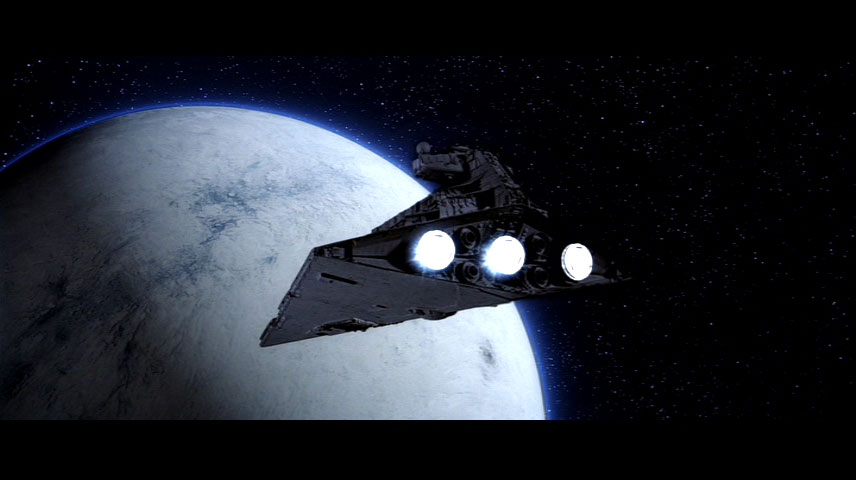
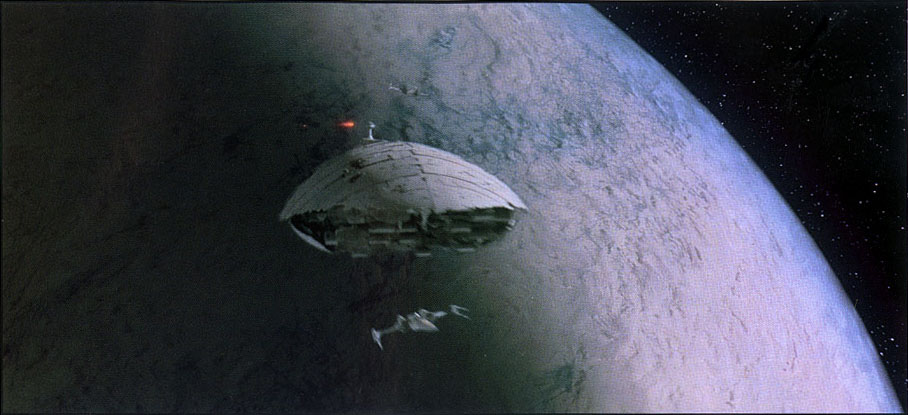
Views of the planet during the probot's arrival and Luke Skywalker's departure are almost identical. The camera is oriented differently and the globe is shaded differently for different times of day. At the longitude of Echo Base, it was later afternoon when the probot landed, and late morning when Skywalker left. Note the jagged band of ocean which meets the horizon in both images, and the icy subcontinental land masses near the visible limb of the planet.

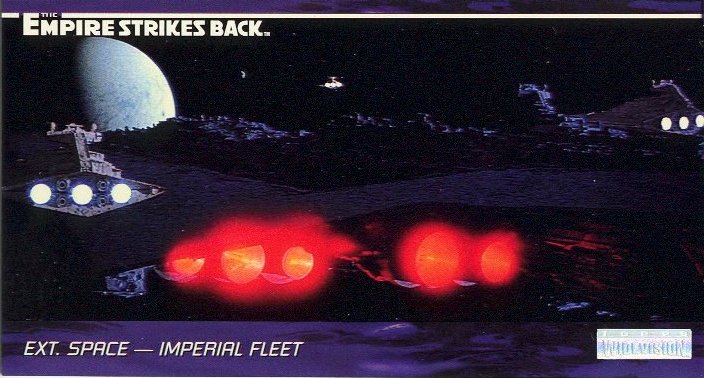
Two shots from the launch of the first rebel transport are worth comparison, since they are effectively simultaneous. One shows the whole globe from a vantage point near the star destroyer Tyrant. The other shows a closer view past the transport at the moment when the ion cannon opened fire. The two views are not at the same angle relative to the planet; the terminator is at a different relative meridian. One or two moonshadows are visible in thge longer-range picture.
Other images include a publicity photo of a whole-disk view of the planet and three moons. The configuration of the system during the Executor's arrival is similar but not idential. For instance, the grey moon is at a projected position of 2.1 planetary radii in the publicity shot, but 1.9 in the movie scene. In other words, the moon has moved between these shots, and the moonshadow has moved accordingly.


This page was constructed and is maintained by
Curtis Saxton.
This page is neither affiliated with nor endorsed by Lucasfilm Ltd.
Images included in or linked from this page are copyright Lucasfilm Ltd. and are used here under Fair Usage terms of copyright law.
This site is kindly hosted by TheForce.net.